Friday, February 27, 2009

Chip off the 'ole Block

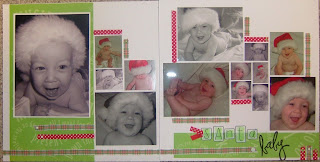
Chipboard, I'm still figuring it out. I have tons of it, but sometimes don't have a clue what to do with it. They make letters and images of all sorts of chipboard. Here's a few thing that I've discovered about chipboard. If it's naked, which means there's no color or pattern on it...you can paint it, ink it, stamp it, and glue paper to it. It's very, very versatile and fun to use. 1. Here I painted the green chipboard to add semi-borders to the page.
2. Here I just inked the edge of the arrow chipboard. The arrow is what you would call naked because there is no design on it. I also stamped on the golden yellow circle in the middle of the second page.
3. Here I painted the blue circle, added scallops behind it, and put rub-ons on it along with stickers.....all for the title.
4. Here is where I decoupaged the patterned paper on to my arrow. It's very easy. You glue, you use a exacto knife to cut, and then sand the edges.
5. I also decorated my black airplane with brads.
6. Here I mixed and matched different chipboard alphabet together making a fun title.
7. Here's a picture of what dressed chipboard looks like. See how the title has a design in it already. By the way, I got that chipboard at Target in the $$$ spot.

I scrapbooked today....

Nothing fancy, but I did get 8 pages done for a total of 4 layouts. All the pages I've been showing on here are from long ago. Today I did lots of pink pages for Makenna from when she was born. Yes, I'm that far behind. I'm going to an all day crop in a couple of weeks with some friends. Mindy asked me if I wanted to come over today to start getting inspired to scrapbook. While she sorted through her pictures (which is still scrapbooking), I managed to finish one layout. (Well, it's not completely finished. I have to add one more picture to my page. I had the picture, but the picture was too dark compared to the other ones. Makenna looked.....well, let's just say she didn't look like Makenna. Then after coming home, eating, watching a movie with the boys, I did three more layouts. The mojo is flowing......Yay!!! It's been too long. Here's the one I did at Mindy's house with the missing a photo. It'll obviously go right underneath the going home title. Super easy...pictures, paper, stickers and just a tiny bit of ribbon. All I used on this page was paper, stickers, and ribbon. Oh, and I wanted a sticker to fill in the spot on the bottom left, but I didn't have on that big, so I stamped the butterfly and punched out the circle and scalloped circle. EASY !
Okay, this paper looks red, but it's really dark pink. I'm talking SIMPLE: Pictures, paper, and stickers.

SUPER EASY PAGE! The title is...Snow Much Personality...get it?? So much personality. I needed to get as many pictures on this page as possible because well, I love them all. I mean seriously, how often can you get 12 pictures on a layout, and it doesn't look too crowded. Shoot, I didn't even mat any pictures. Who says you have mat them? See, that's why I love scrapbooking. There are no rules! OH, and just for the record, all I used on this page was paper, stickers, rubons, (snow), and Stamps (much), oh and two left over snowflake brads that I have had FOREVER.

P.S. Thanks Mindy for getting me going!

Monday, February 23, 2009

Wake up and smell the...FLOWERS!

They're not just for girls, and I speak from experience. Check out my collection of flowers before I even had a girl. Okay this was actually only part of my collection of flowers befor eI had a girl. I think I've only bought one bottle since I've had a girl, and...shhhhh....I haven't even used it.

1. This was a kit idea. Take a big flower and cut it in half. I loved it.
2. Use flowers for borders.
3. Use flowers to decorate your own background paper.
4. Use a flower to add oomph to at title.
5. Use flowers to add to journaling.


Also you can stamp on them, paint them, and add rubons to them. You can use them to decorate a frame, a picture, almost anything. Flowers are so fun!!

Stuck on You!

As a little girl, I had a sticker book. I used to love going to the little tiny store in the middle of mall and buy stickers. I still have all my sticker books. So, of course, I still LOVE stickers. I used to be a culprit of the sticker sneeze...you all know...where you just throw the stickers on the page all over just to use them up, but now, I try to strategically place my stickers on my pages to where they will look like they are there for a reason instead of throwing them on.
Here's just a few pages of things that I did with stickers. 1. Here I inked the edges of my stickers and added them in groups of three on the page.
2. I don't normally use big stickers like this, but the Pirate page called for it. It's hard to know where to place the sticker on your page. On this page, I believe that I cut out the whole ship sticker and moved it around until I was ready to adhere it to the page. And then of course the title is also a sticker. Man, that sure made it easy.
3. I know that I read about this in a book or something. Grouping things in threes is a huge PLUS. So I made the squares and then placed three snowmen on them. I also did a little photo corner with snowballs at the top of the main picture.
4. See, once again I did the three thing. This time I simply matted them on a scalloped circle that I had punched out. 5. Man, these stickers here are OLD. But at the time I made this page, I wasn't buying anything new, and was trying to use up some of my stash. I simply added them to my title strip. Oh, and by the way. My word painting are very old letter stickers too. I just added rub-ons on top of them to add the second word of the title.
6. I don't know why, but I really like this page. Maybe it the colors, ore maybe it's the ADORABLE little boy holding the cute little dog. These are my neighbor's dogs, and Luke LOVES dogs. Here I added some dog stickers to the photo mat that I used for the main picture. Easy enough, right? 7. Here I used word stickers to decorate the edge of my picture of Kaleb. He was such a cute little guy.

Ready for Ribbon?

A little ribbon goes a long, long way. I mean, seriously, you buy a roll of it and it will last FOREVER. How many of you have ribbon, but don't know what to do with it? Believe me, you can use it in so many ways. It's sooooo versatile. Here's a few ways that I've used ribbon, but go here for 101 more ideas.

1. You can use it to hold down pictures.

2. You can make a flower with it, just make loops and hold it all together with a brad.

3, You can put ribbon on tags.
4. You can tie ribbon on your main photo or make a border with it.
5. You make a handy dandy frame with it.
6. You can accent a border or fold your ribbon over to make a tassel.
7. You can make tabs on pictures.

Cute as a Button

There are tons of uses for buttons. And they're fun to use. Not to mention, they're cheap. You can get big bags of misc. buttons for a couple bucks at Hobby Lobby. Here's a few things you can do with them.


1. Make a border out of them.
2. Decorate a Christmas tree with them.
3. Add them to the corners of a frame.
4. Add them to emphasize a picture.


5. Use the button as an "o" in your title.


6. Add more color to your page.


7. Add them to the center of your flowers.


8.. Make an entire frame out of them.

9. Make patterned paper background with them. Clear buttons make great bubbles and water accents.

10. Add a little extra oomph to your title or border just to make the page a little more fun.

There is so much you can do with buttons. You can even paint them or put rub-ons on them. I personally don't spend that much time on my embellishments, but it's still fun to do if you have time. Jennifer McGuire is a great scrapbooker/cardmaker who has a great book called 100 things you can with Scrapbook supplies, and oh my word! It's on sale for $6 here. Such a great book with tons of ideas in it. She's also has an article in the magazine Creating Keepsakes every week. She's awesome, and has tons of ideas of how to get the most out of your supplies. And shhh...she actually lives around here in Cincinnati, and teaches classes at Stamp you Art Out over in Kenwood.

for the love of blogs!


This, my friends, is why I love blogging. If it wasn't for my blog, my journaling would be even worse on some of my pages. I don't have a great memory at least not for the little details, but thanks to blogging....I can record the memory, and save it for the journaling of a page later! Just like I did on this page with Blake and the pickle juice. I think I copy, pasted, and printed it out. Talk about some easy journaling!

some of my favorite pages

These are some of my favorite pages mostly because these are some of my favorite pictures.
Love, Love, Love these pictures of Blake. They are some of my all time faves. Oh, and I love the spiral stampin up punch that lets you had the fake torn notebook paper.

The flower is a Technique Tuesday stamp. It's so much fun because there are different designs for the petals.

This paper has absolutely nothing to do with baseball, but I loved it with these pictures none the less.

I like the simplicity of this page, not to mention the adorable baby on it! The word baby is actually a acrylic stamp from Heidi Swapp.

Some cards

I have all the stuff to make cards, but I rarely do it. However, here's a few I did most recently. I got these adorable kid stamps at Pink Cat Studio. I love the Billy and Lilly stamps. They are sooooo cute. Some of the stamps you can mix and match the outfits. Those are probably my favorite. When I first got them, I went on a card making frenzy. But I haven't done them since.


Then here's a few that I've made at the most recent stampin up parties that I've been too.